

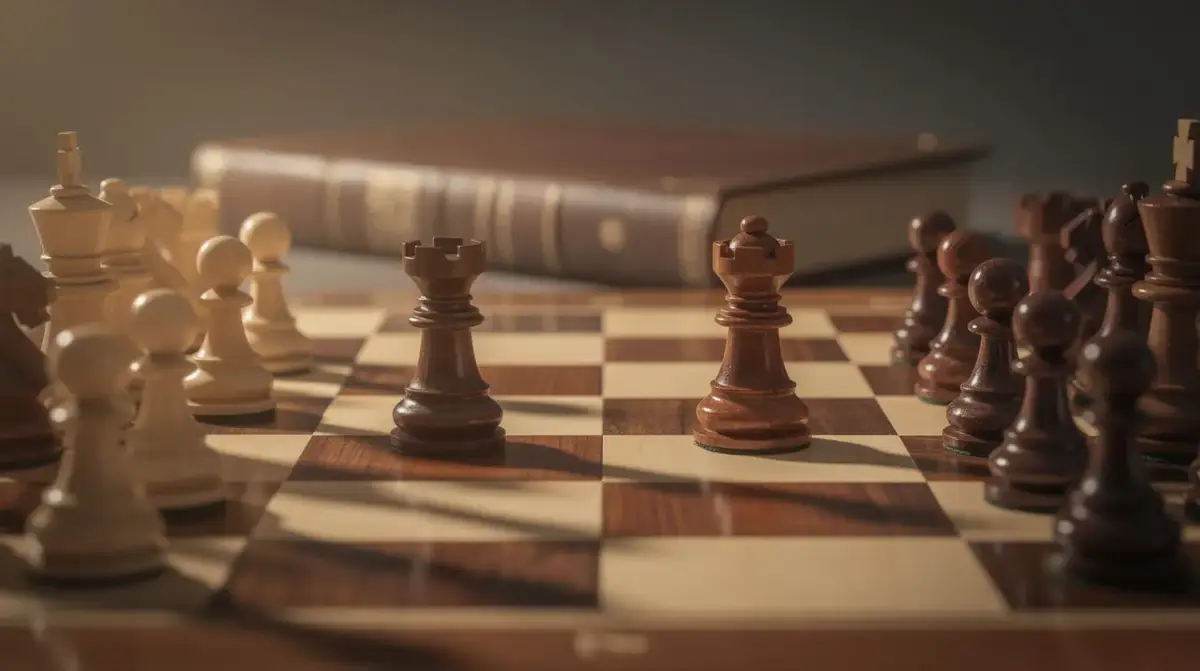
Rook endgames are the most common type of endgame you will ever face over the board. Studies show that roughly half of all chess games that reach an endgame involve rooks, yet they remain one of the most misunderstood and misplayed phases of the game. In this guide you will learn the core principles, classic techniques, and practical patterns that separate players who convert their advantage from those who let it slip away.
Why Are Rook Endgames So Difficult to Win?
Rook endgames are notoriously difficult to convert because rooks are the most powerful defensive pieces on an open board, making it extremely hard to stop perpetual checks or build a decisive advantage from a small material edge. Unlike piece endgames where a single extra pawn can feel overwhelming, in rook endings the defending side has enormous counterplay through active rook placement and relentless checking.
Grandmaster Savielly Tartakower once said that "all rook endgames are drawn," and while that is clearly an exaggeration, it captures something real: even a one or two pawn advantage demands precise technique to convert. The rook is a long-range piece that can cover the entire board from a single square, and a poorly placed king or passively positioned rook can undo a whole game of good work in just a few moves.
"The rook endgame is where chess technique is truly tested. It is not enough to have an extra pawn - you must know exactly how to use it." - Vasily Smyslov
The good news is that rook endgames follow well-defined principles. Once you learn them, you will start converting positions that used to slip through your fingers, and you will also defend them far more stubbornly when you are the one under pressure.
If you want to build this knowledge systematically, the endgame training module on this platform covers rook endings across three difficulty tiers with interactive feedback on every move.
What Are the Most Important Principles in Rook Endgames?
The most important principles in rook endgames are keeping your rook active, placing it behind passed pawns, centralizing your king, and cutting off the enemy king. These four ideas, applied consistently, form the foundation of winning rook endgame technique.
Principle 1 - Keep Your Rook Active
A passive rook is almost always the reason a won endgame gets drawn or a lost endgame gets saved by the wrong side. Your rook needs open files, ranks, and space to breathe. Even when you have an extra pawn, if your rook is stuck defending that pawn from behind, the defending side can often draw by keeping their own rook active and harassing your king.
The golden rule is: give your rook freedom, even if it means temporarily allowing counterplay. An active rook that creates multiple threats is far more valuable than a passive rook tied to a pawn's defense.
Principle 2 - Rook Behind the Passed Pawn
Whether you are attacking or defending, the rook almost always belongs behind the passed pawn, not in front of it or beside it. When you push a passed pawn, the rook behind it gains power with every advance - the further the pawn goes, the more space the rook controls. When you are defending, placing your rook behind the enemy passed pawn stops it from advancing without losing material.
Pro tip: A rook in front of its own passed pawn is a passive rook. A rook behind its own passed pawn is an aggressive rook. Always prefer the latter unless there is a specific tactical reason to do otherwise.
Principle 3 - Activate Your King
In the endgame, the king is a fighting piece. Players who keep their king tucked away on g1 or c8 while their rook does all the work are making a fundamental mistake. The king must march toward the center or toward the key pawns. A centralized king on d4 or e5 provides vital support for passed pawns, creates mating threats, and limits the enemy king's movement.
Principle 4 - Cut Off the Enemy King
One of the most effective techniques in rook endgames is using your rook as a barrier to cut off the opposing king, preventing it from reaching the key sector of the board. This is called a "checking distance" technique in positions with passed pawns, and it is at the heart of the famous Lucena and Philidor positions that every chess player should study.
What Are the Lucena and Philidor Positions, and Why Do They Matter?
The Lucena and Philidor positions are the two most fundamental rook endgame structures in chess. The Lucena position is the blueprint for winning a rook-plus-pawn versus rook endgame, while the Philidor position is the essential drawing technique for the defending side. Together, they form the foundation of all practical rook endgame play.
The Lucena Position - How to Win With a Passed Pawn
The Lucena position arises when the attacking side has a pawn on the 7th rank with its king on the promotion square, but the rook is blocked from promoting directly because the king is in the way. The winning technique is called "building a bridge," and it works like this:
- Move your rook far from the pawn - typically to the 4th rank (e.g. Ra4).
- Use that rook to shield your king from checks (the "bridge").
- Step the king forward with the rook blocking any incoming checks from the side.
- Promote the pawn safely.
Understanding the Lucena position means you know exactly what position you are aiming for when you have a passed pawn, and you can guide the game toward it deliberately rather than wandering around hoping things work out.
The Philidor Position - How to Draw as the Defender
The Philidor position is the drawing fortress for the weaker side. The key idea is to keep your rook on the 6th rank (if your opponent's pawn is on the 5th rank or lower), cutting off the enemy king. The moment the pawn advances, you swing your rook to the back rank and start checking the enemy king from behind, using the "checking distance" to your advantage.
The critical rule is: your rook should never go to the 6th rank after the pawn reaches the 6th rank. At that point it is too late - you must immediately go to the back rank and start checking. Missing this timing is one of the most common mistakes in practical rook endings.
If you know the Lucena and Philidor positions, you already understand 80% of all rook-plus-pawn versus rook endgames. Study them first, and you will save and win countless games at the club level.
How Do You Convert an Extra Pawn in a Rook Endgame?
To convert an extra pawn in a rook endgame, you need to activate your king, create a passed pawn or target weak enemy pawns, use your rook aggressively, and transition into a technically winning position such as the Lucena. Simply having an extra pawn is not enough - you need a clear plan.
Step 1 - Identify the Most Dangerous Passed Pawn
If you already have a passed pawn, make it your primary weapon. Rush your king toward it to support its advance. Place your rook behind it immediately. If you do not yet have a passed pawn, look for the best way to create one - whether by advancing a pawn majority on one flank or by exchanging pawns strategically to isolate a weakness.
Step 2 - Create Multiple Threats on Both Wings
One of the most reliable winning methods in rook endgames is to create pressure on both sides of the board simultaneously. Your opponent's rook can only be in one place at a time. If your passed pawn on the queenside forces the enemy rook to stay there, your king and rook can go to work on the kingside - and vice versa. This two-front pressure is what Akiba Rubinstein, arguably the greatest rook endgame player in history, used repeatedly to convert even tiny advantages.
Step 3 - Use the "Outside Passed Pawn" Technique
An outside passed pawn on the a or h file is particularly valuable because it draws the enemy king away from the main battlefield. For example, if you push your a-pawn to a6, your opponent's king may have to go to the queenside to stop it. That gives your king a free run at the kingside pawns, picking them up and eventually queening one of them.
Pro tip: When you have a rook endgame with an extra passed pawn, ask yourself: "Is my king helping the pawn?" If not, immediately start walking it toward the action. King activity is the single biggest factor in converting rook endgames at the club level.
Step 4 - Transition to a Winning Pawn Endgame When Appropriate
Sometimes the cleanest winning technique is to exchange rooks into a winning pawn endgame. If you can reach a position where the resulting king and pawn endgame is a theoretical win - for example, where your king dominates the opposition and your passed pawn promotes while theirs does not - then the rook trade is the fastest and safest path to victory.
To practice these conversion techniques against a realistic opponent, try playing the human-like chess bots on the platform, particularly the Endgame Challenger, which is specifically trained to test your technique in late-game positions.
How Do You Defend Difficult Rook Endgames and Hold the Draw?
To defend difficult rook endgames and hold the draw, you should keep your rook as active as possible, use perpetual checks to harass the enemy king, aim for the Philidor defensive setup, and look for fortress positions where your king and rook create an impenetrable barrier. Passive defense almost always loses - active counterplay is your best drawing weapon.
The Art of Checking - Using Checking Distance
When you are down a pawn with a rook, your primary weapon is checks. A king that is being checked repeatedly cannot support pawn promotion easily. The further your rook is from the enemy king along the checking rank or file, the longer the checks last. This is called "checking distance," and it is why the Philidor defense works: the rook needs maximum space to deliver annoying checks from the back rank.
When to Seek a Fortress
A fortress is a defensive setup where the weaker side creates a position that simply cannot be broken down. In rook endgames, the most common fortress involves placing your king in a corner or on a short side and keeping your rook ready to block any pawn advances. Rook-plus-wrong-color-rook-pawn endgames are classic drawing fortresses: if the defending king can reach the corner (a1, h1, a8, or h8) when the promoting pawn is an a or h pawn, the game is always a draw regardless of material.
Common trap: Many players in a losing rook endgame passively defend with their rook glued to the back rank, hoping the opponent makes a mistake. This is the worst strategy. A passive rook gives your opponent total freedom to maneuver. Always look for checks, counterattacks, or active rook play even when defending.
What Are the Most Common Rook Endgame Mistakes at Club Level?
The most common rook endgame mistakes at club level include misplacing the rook in front of the passed pawn, failing to activate the king in time, allowing the enemy king to penetrate to key squares, and not knowing when to transition to a pawn endgame. These errors cost hundreds of rating points every year for players in the 800 to 1800 range.
Mistake 1 - Rook in Front of the Pawn
Placing your rook directly in front of your own passed pawn blocks it. The pawn cannot advance without moving the rook first, and that often wastes tempos or weakens the pawn's defensive structure. Always remember: rook behind the pawn, not in front of it.
Mistake 2 - King Too Far From the Action
This is perhaps the most frequent mistake. Players who spend the endgame with their king on g1 or f8, far from the critical pawns, are practically playing a piece down. Every move you spend getting your king to the center is a move you are not spending on the actual winning plan.
Mistake 3 - Trading into a Lost Pawn Endgame
Rook endgames that are technically drawn can become instantly lost if you exchange rooks carelessly into a pawn endgame where your king is in the wrong place. Before any rook trade, always calculate the resulting pawn endgame. Apply the "opposition" and "key squares" concepts before pulling the trigger.
Mistake 4 - Ignoring Zugzwang
Zugzwang plays a role in rook endgames more often than most players realize, especially in positions with kings placed on critical squares. Understanding how to create and avoid zugzwang can be the difference between winning and drawing a technically winning position. For a deep dive into this concept, check out our article on Chess Zugzwang: Force Winning Positions Every Time.
Most rook endgame losses at club level come from king inactivity and passive rook placement - not from complex theoretical mistakes. Fix these two habits and you will immediately see results in your games.
How Can You Practice and Improve Your Rook Endgame Play?
You can improve your rook endgame play through targeted study of classic positions, regular practice against strong opposition, and systematic analysis of your own games to identify recurring mistakes. The combination of theory and practice is far more effective than either approach alone.
Study the Classics
The games of Vasily Smyslov, Akiba Rubinstein, and Jose Raul Capablanca are gold mines for rook endgame technique. Capablanca in particular was known for his near-perfect rook endgame play, and studying even 10 to 20 of his endgame positions will dramatically sharpen your intuition for piece placement and pawn structure evaluation.
Analyze Your Own Games
After every game that reaches a rook endgame, spend time reviewing your moves. Did you place your rook optimally? Did you activate your king quickly enough? Where did the position become critical? Using a game analyzer to review your rook endgames will help you identify the specific moments where your technique breaks down, turning every game you play into a targeted learning session.
Solve Rook Endgame Puzzles
Tactical puzzles are not just for middlegame combinations. Rook endgame studies and problems train your pattern recognition for positions like the Lucena, the Philidor, outside passed pawn techniques, and fortress setups. Using a dedicated chess puzzles and tactics trainer regularly will build the automatic pattern recognition you need to make the right decisions quickly under time pressure.
Play Rook Endgames With AI Feedback
One of the fastest ways to improve is to practice rook endgame positions repeatedly with interactive feedback. The learn chess with AI feature lets you explore positions move by move with visual guidance, so you can experiment with different approaches and immediately see the consequences of your choices without losing a rated game.
For a full structured program covering both endgames and tactics, the chess learning course for puzzles and endgames includes daily exercises specifically designed to build the practical skills covered in this article.
The endgame is where technique lives. If you want to stop losing won games, invest 20 minutes a week specifically in rook endgame study. After one month you will notice a real difference at the board.
Which Rook Endgame Positions Should Every Player Know by Heart?
Every chess player should know these seven rook endgame positions by heart: the Lucena position, the Philidor position, the back-rank defense, the outside passed pawn technique, the "wrong rook pawn" draw, the active king march, and the two-rook pawn versus one-rook pawn conversion. These seven positions cover the vast majority of practical rook endgames you will encounter in real games.
- Lucena Position: Rook and pawn on 7th rank, defending side's king cut off - winning technique is "building a bridge."
- Philidor Position: Defending with rook on 6th rank when pawn is on 5th or lower, then switching to back rank checks when pawn advances.
- Back-Rank Defense: Keeping the rook on the back rank to deliver long-distance checks - maximizes checking distance.
- Outside Passed Pawn: Using a remote passed pawn to distract the enemy king while winning pawns on the other wing.
- Wrong Rook Pawn Draw: If the promoting pawn is an a or h pawn and the defending king can reach the corner, it is always a draw.
- Active King March: Walking the king aggressively toward weak enemy pawns or toward the queening square of your passed pawn.
- Two Pawns vs One Pawn Conversion: Creating a passed pawn by advancing the pawn majority, then winning with standard technique.
Understanding these patterns also connects beautifully to broader positional thinking. For context on how pawn structures create these endgame advantages in the first place, the article on Pawn Structure: How to Plan Your Chess Strategy is an excellent companion read. And for a broader view of endgame winning techniques that complement rook play, see our guide on How to Win Chess Endgames: Essential Techniques.
You do not need to memorize hundreds of theoretical positions to dramatically improve your rook endgame results. Master the Lucena and Philidor positions first, then add the outside passed pawn technique and the wrong-rook-pawn draw. That knowledge alone will save and win you dozens of games each season.
Frequently Asked Questions About Rook Endgames
Is a rook and pawn versus rook endgame a win or a draw?
A rook and pawn versus rook endgame is generally a draw with best play unless the attacking side can reach the Lucena position or the defending king is cut off far from the action. The exception is rook pawn endings (a-pawn or h-pawn), which are drawn even more easily if the defending king reaches the corner.
Where should the rook go in the endgame?
In the endgame, place your rook behind your passed pawn if you have one, on the 7th rank to attack enemy pawns and restrict the enemy king, or on open files to create multiple threats. Avoid passive rook placement where the rook is merely defending rather than attacking.
How do you stop perpetual checks in a rook endgame?
To stop perpetual checks in a rook endgame, keep your king sheltered by using your rook as a blocker (the "bridge" technique), advance your pawn to give the king room to escape checks, and aim for positions where the checking distance becomes too short for the defending rook to be effective.
When should you exchange rooks in the endgame?
You should exchange rooks when the resulting pawn endgame is a theoretical win for you - specifically when your king controls the opposition, your passed pawn promotes faster, and the enemy king cannot catch it. Avoid exchanging rooks if the pawn endgame is a draw or if you are the weaker side and need the rook to create counterplay.
What is the "bridge" technique in rook endgames?
The "bridge" technique is the winning method in the Lucena position. You move your rook to the 4th rank (Ra4 for example), use it to block horizontal checks on your king as the pawn advances to promotion, and shield your king step by step until the pawn safely queens. It is called a bridge because the rook literally bridges the gap between the king and the checking rook.
How does zugzwang affect rook endgames?
Zugzwang is less common in rook endgames than in king-and-pawn endgames, but it does occur in critical positions where both sides have limited king or rook mobility. Recognizing when you are in zugzwang (being forced to move into a losing position) or can create it for your opponent is an advanced technique that pays off in tightly contested endings. For more on this theme, read our article on Chess Zugzwang: Force Winning Positions Every Time.
Rook endgames are won and lost on technique, not talent. Start with the Lucena and Philidor positions, activate your king, keep your rook behind the passed pawn, and practice regularly with targeted endgame exercises. Use the endgame training module to drill classic rook positions, upload your games to the game analyzer to spot your specific mistakes, and put your technique to the test against the Endgame Challenger bot. Every rook endgame you study now is a half-point you keep next week at the board.